Scam alert: these 3 simple iPhone tricks will help protect your Apple ID from thieves
Bad news, folks: iPhone thefts are on the rise. Not only that but a new report from The Wall Street Journal (WSJ) suggests thieves are exploiting Apple’s recovery key system to lock users out of their Apple accounts for good.
Specifically, eagle-eyed criminals are generating new 28-character recovery codes – having accessed stolen iPhones through spying on lock screen passwords – to commandeer users’ Apple IDs. Per Apple’s security guidelines, generating a new recovery key means “you could be locked out of your account permanently,” and thieves are using this loophole to rack up purchases on stolen iPhones while users scramble to cancel their bank cards.
Thankfully, there are steps you can take to better protect yourself from the consequences of iPhone thievery, and in this article, we highlight three simple settings you should consider activating now (as first explained by the WSJ (opens in new tab)).
1. Set up a custom alphanumeric code
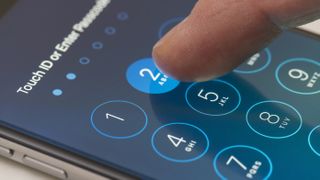
First thing’s first: you should always be using Face ID if your iPhone is compatible with this biometric security feature (for those not in-the-know, every iPhone released after the iPhone X – aside from the iPhone SE entries – has Face ID capabilities). Try as they might, thieves can’t copy your facial identity, and using Face ID as your primary unlocking method means they won’t be able to spy on your passcode, either.
If and when you do need to punch in a passcode, though, make sure you opt for an alphanumeric one. Four- and even six-digit numeric passcodes are easy to remember, but alphanumeric codes combine numbers and letters to really test thieves’ memory.
iPhone passcodes are numeric by default, so to enable an alphanumeric passcode, head into Settings, tap Face ID & Passcode, enter your current passcode and scroll down to Change Passcode. Here, you’ll be asked to verify your old passcode once more, then tap Passcode Options to access the Custom Alphanumeric Code keypad.
2. Use a Screen Time Password to limit Apple ID access
Okay, we’ll admit: this next trick is likely to prove a headache in the short-term, but the long-term payoff could be the protection of your Apple ID.
As the WSJ notes, you can use a Screen Time Password to add one additional layer of security to your Apple ID. Annoyingly, doing so means you’ll have to enter your Screen Time Password any time you want to make innocent changes to your Apple ID, but that’s a worthy sacrifice for such a helpful stopgap feature, in our book.
To enable a Screen Time password for your Apple ID, head to Settings and tap Screen Time, then tap Use Screen Time Passcode. Set a passcode of your choice, then enter your Apple ID credentials so you can recover the Screen Time Password if you forget it.
Next, head to Content & Privacy Restrictions, then toggle Content & Privacy Restrictions on. Scroll down to the Allow Changes menu, and switch the Account Changes slider to Don’t Allow. For one more layer of security, you can also block Passcode Changes at this step, which removes the Face ID and Passcode menu from the Settings app.
3. Disable Control Center access on the lock screen
Again, this change may take some getting used to if you’re someone who regularly accesses the Control Center without jumping into your iPhone proper, but disabling Control Center access on the lock screen will stop thieves from activating Airplane mode.
Why is this important? Well, in the event that someone steals your phone but doesn’t know your passcode, you can use Find My iPhone to track its location from another iOS device (see our dedicated guide on how to use Find My iPhone if you haven’t yet set up Apple’s tracking software on your device). If the thief in question activates Airplane mode, though, your iPhone can’t be tracked using Find My iPhone.
Disabling Control Center access on the Lock Screen, then, means you may be able to quite literally track the movements of your unsuspecting looter – and more importantly, the location of your stolen iPhone.
To make this change, head to Settings and tap the Face ID & Passcode menu. Enter your iPhone’s passcode, then scroll down to the Allow Access When Locked menu. Here, toggle Control Center off (it’s on by default).


